Go — Raspberry Pi GPIO Hello World Tutorial
For a relatively new language, Go is very reliable. I have been using it since last year for several reason, since this one is full of surprise.
So recently, I bought a new pi 3, and I mostly used C language for my previous pi 2. However, I notice many tutorial uses Python at the moment, and I am not a big fan of it. So I randomly searched some go libraries and tutorial for Raspberry Pi’s GPIO and play it a bit with some leftovers wires in my home.
In this article we are going to build a very simple LED toggle using Raspberry Pi and Go Language.
It is possible to install the whole go environment inside the Raspberry Pi. However, it will takes lot of resources inside this small machine. Then, I prefer to develop the program and build it remotely from my workspace.
1. Setup Raspberry Pi SSH
Since we are going to develop it remotely, first of all, we need to plug the Raspberry Pi and enter to the OS. Also make sure the Pi is connected through net using the WIFI, or LAN. Then, Open the UNIX terminal, and type:
sudo raspi-config
Your terminal will prompt the configuration window for various purpose. Then, select 5. Interfacing Options > P2 SSH Then, select Enable to enable the SSH.

Alternatively, we can use systemctl to enable and start the service, such as:
sudo systemctl enable ssh then, sudo systemctl startssh
2. Accessing Rasperry PI using SSH
Once, your Pi is connected to the net and accessible using SSH. From your workspace, access the Pi using ssh command:
ssh pi@[raspberry pi host address]
For instance ssh pi@192.168.xx.xx By default, the username should be pi, and after that, the terminal will ask you to enter the password. For the information, the usual default Raspberry Pi password is raspberry.
3. Using GPIO
We are going to create a very simple blink LED program and will install it to the Raspberry Pi. So before that, we need to understand a bit about a basic info of GPIO.
In easy way Raspberry Pi’s GPIO (General Purpose Input / Output) will act as an interface between the Pi’s system and outside system. I/O module will use GPIO pins so Raspberry can read the input or show the output from device and sensors.

As it shows on the image, the device has several types of pin such as: GPIO, Ground, 3.3v, and 5v pins. For this tutorial, we are going to play a bit using GPIO pin 18, and the ground pin.
We can also access the GPIO pins information from the terminal using UNIX terminal command: pinout .
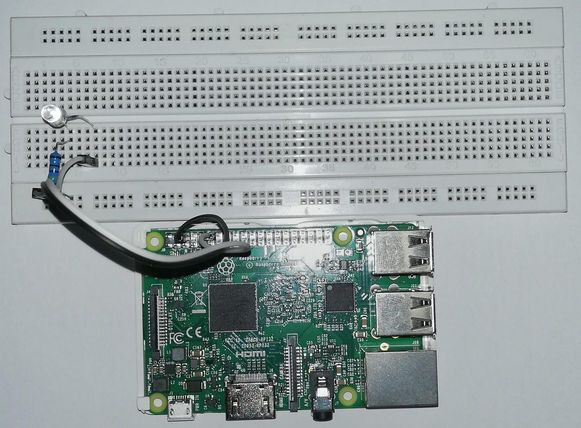
4. Assembling LED Device
For this tutorial, we need to prepare several items such as:
- USB cable and charger for power up the Raspberry PI,
- 2 short jumper wires,
- Breadboard,
- LED, and
- 330Ω resistor
I am not going to explain in depth about the installation process, since it is widely discussed on several raspberry tutorial on internet (please see the references section for Pi-LED assembling tutorial).
5. Developing the Go Code
Finally, we are going to develop the code using Go. First of first, we will use the available package on the internet such as:
https://github.com/stianeikeland/go-rpio, and http://gobot.io/documentation/platforms/raspi/
Go-rpio support the basic operation for GPIO using Golang so I believe it is quite adequate to be used on this tutorial. Whilst Gobot, provide more sophisticated SDK library for GPIO pins access and specific GPIO drivers such as: LED, motor, relay, servo, and etc.
In this case, I will going to use Go-rpio for a basic LED hello world tutorial, since we are not going to use those drivers at the moment:
As I mention on the first section, we are going to develop the code remotely. So first of all, lets go get the package first so we can use it.
go get github.com/stianeikeland/go-rpio
This is the sample code to create a blink application using Go in raspberry pi:
package main

import (
	"fmt"
	"time"

	"github.com/stianeikeland/go-rpio"
)

func main() {
	fmt.Println("opening gpio")
	err := rpio.Open()
	if err != nil {
		panic(fmt.Sprint("unable to open gpio", err.Error()))
	}

	defer rpio.Close()

	pin := rpio.Pin(18)
	pin.Output()

	for x := 0; x < 20; x++ {
		pin.Toggle()
		time.Sleep(time.Second / 5)
	}
}
Explanation: This code will try to open a GPIO and set the listen pin for pin 18. The pin will be set for the Output (Input for reading, i.e: sensor, etc). For 20 times, it will toggle the pin (Low > High > Low) and set the delay to 200ms. Once the operation done, the program will be finished.
6. Build and Upload the Program
To build the program safely we can use this command:
env GOOS=linux GOARCH=arm GOARM=5 go build
The above command will tell the compiler that we’re building for Linux and the ARM architecture. Now there are several ARM versions supported by the Go compiler, but we’re looking for version 5. Then, we are going to upload / copy the file to the connected raspberry pi. For this purpose, we are going to use scp command to upload the file.
scp [go binary] pi@192.168.43.208:[remote dir]
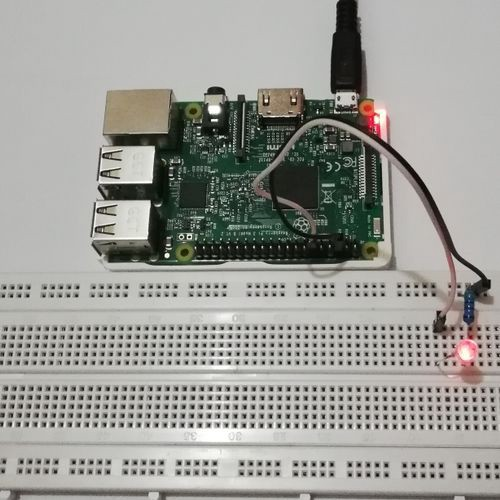
7. Running the Program
Once the go binary has been uploaded (for instance, we uploaded it to /home/pi/go and the binary name is gopio)then what we need to do is to execute it using:
./gopio
If the component is assembled correctly, and there is not error in the code, the LED will blink, and it will stop blinking after 20 times.
8. Conclusion
We can use Raspberry-Pi to develop a program inside a Raspberry-Pi. In this tutorial, I show you a very simple example on how to create a blinking LED using Raspberry Pi, with Golang program.
9. Image Link and Resources
https://thepihut.com/blogs/raspberry-pi-tutorials/27968772-turning-on-an-led-with-your-raspberry-pis-gpio-pins https://www.thepolyglotdeveloper.com/2017/04/cross-compiling-golang-applications-raspberry-pi/ https://github.com/stianeikeland/go-rpio https://gobot.io/documentation/platforms/raspi/ https://icons8.com/icon/13443/raspberry-pi (premium user)