Веб приложение с Kotlin.js: Начало
Почему Kotlin.js? Почему стоит использовать Kotlin для веб разработки? Вот несколько причин:
- Знакомство: Если вы пришли из компилируемого языка типа Java, Swift или C#, вы найдете Kotlin очень простым для изученмя, и вы должны уже быть знакомы с ним, если вы разработчик для андроид.
- Дружелюбные инструменты: IDE может помочь вам во многом с JavaScript, так как Kotlin идет с первоклассной поддеркой в IDE, значит вы можете находить, общие оишбки при наборе кода.
- Распространение кода между платформами: С помощью Kotlin Multiplatform Project, вы можете написать бизнес логику вашего приложения один раз и распространять его на множество платформ включае бэкенд, бразуер фротентд, Android и iOS клиенты.
- Совестимость: Возможсть вызывать JavaScript код из Kotlin кода очень важна. Она позвляет вам использовать уже готовый JavaScript код, который был уже написан на Kotlin. Эта совемтостимость имеет и обратное направление. Можно вызывать Kotlin код из JavaScript.
- Проблемы JavaScript: Kotlin отличны вылр если отказались от веб разработки в связи с распространнением JavaScript проблем, таких как необходимость работы с динамической типизацией, странным логическим сравнением или прототипированием.
- Требования: Для этой инструкции, вам необходимо базовое знаение веб-программирования и знакомство с Kotlin и IntelliJ Idea. Если вы полность новичек в Kotlin, возможно вы захотите почитать книгу "Kotlin Apprentice" или видео курс "Программирования на Kotlin"
Начнем.
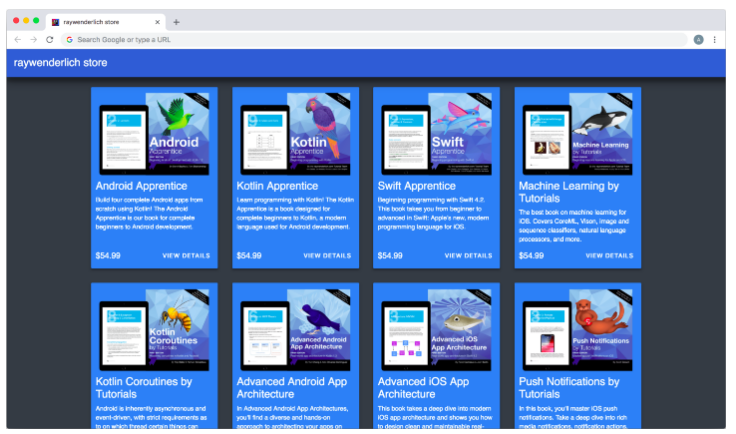
Вы собираетесь создать приложение книжный магазин. Приложение будет получать данные о книгах с вебсервиса, отображать обложки книг с названем, описанием, ценой и кнопкой открыть страничку с деталями. Вот как будет выглдяеть конечный результат:
Чтобы следовать данному руководству, вам необходимо использовать IntelliJ IDEA 2018.8.7 илил познее(бесплатная Community Edition будет достаточно), и Kotlin 1.2.61 или более поздний.
Начинаем с загрузки материала для этого руководства используя кнопку "Download Materials" в верхней или нижней части окна программы. Затем запускаем IntelliJ IDEA и создаем новый проект.
В окне нового проекта, выберите Kotlin в левой части панели и Kotlin/JS в правой части. Затем нажмите "Next"
Новый проект, шаг 1
Для имени проекта используйте bookstore. Выбериме место располжения проекта, или используйте по умолчанию. Затем нажмите "Finish"
Новый проект, шаг 2
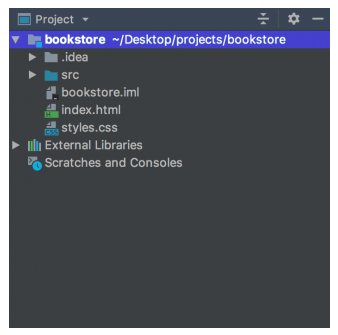
Распакуйте скаченые материалы, и из начальной папки, скопируйте index.html и styles.css в вашу папку с проектом. Структура проекта должна выглядить следующим образом:
Создание главной функции
Создайте новый Kotlin файл с именем Main.kt в папке src и добавьте в нее main() функцию как показано ниже:
fun main(args: Array<String>) {
  println("Hello world!")
}
Заметка: Функция приложения main() может быть в любом Kotlin файле с любым именем, поэтому использование Main.kt не строго обязательно, но вы должны иметь только одну функцию main() в вашем проекте.
Теперь откроем "Build" меню и нажмем "Build Project" чтобы скомпилировать ваш Kotlin код в JavaScript. IDE сгенерирует следующую папку в корне вашего проекта.
Нам нужно упомянуть 2 выходных файла в данном проекте в index.html:
- kotlin.js: Это стандартная Kotlin библиотека, реализованная в JavaScript
- bookstore.js: Это JavaScript, в который блыл скомпилирован Kotlin.
Заметка: Оба файла уже ссылаются для вас внутри скриптами на начальный index.html файл, но вам возмжно нужно проверить их пути на случай если вы ввели другое название проекта.
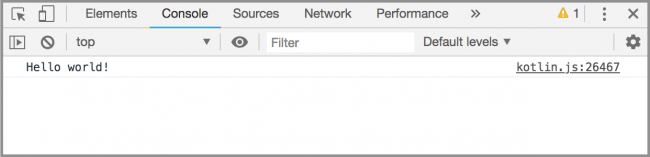
Теперь откроем index.html в вашем браузере, и затем откроем консоль разработчика. Вы должны увидеть "Hello World!",как показано на скриншоте:
Заметка: Каждый раз меняя код kotlin, необходимо билдить ваш проект и затем обновлять HTML страницу чтобы увидеть изменения.
Вызываем JavaScript код из Kotlin
В index.html файле, внутри тега со скриптом, вы найдете JavaScript функцию названную getApiUrl(), который возвращает URL необходимый вам для получения данных магазина в формате JSON
<script>
function getApiUrl(){
  return "https://gist.githubusercontent.com/tarek360/4578e33621011e18829bad0c8d1c8cdf/raw/06d185bebc3e14a56dfa85f53288daddd4ff6a2b/books.json";
}
</script>
Есть множество путей для доступа JavaScript функции или переменно из кода Kotlin. Один из них это использование функции js(), которая позволяет передавать простой код JavaScript как строку.
Добавим следуюущую строку кода в Main.kt файл, вне main() функции.
val API_URL = js("getApiUrl()") as String
Здесь вы передаете строку getApiUrl() в js() функцию. Теперь getApiUrl() функция всегда возвращает строку, вы можете привести её безопасно к String Kotlin, и хранить как обычное значение.
Теперь, обновим main() функцию для выведения значения API_URL свойства вместо "Hello world!"
fun main(args: Array<String>) {
  println(API_URL)
}
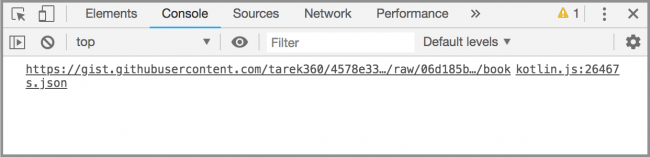
Билдим проект и обновляем index.html в браузере. Вы дожны увидеть значение API_URL переменной выведенной в консоль, как на скриншоте ниже

Теперь у вас есть URL сохраненный в API_URL значении, который вы используете позднее.
Очистим main() функцию, чтобы подготовить её к тому, что будет происходить дальше.
Representing Books
Чтобы получить данные от сервера их отобразить их в UI, необходимо создать новый Kotlin класс для отображения одной книги. Созадим файл Book.kt в src папке и поместит тут класс данных:
data class Book(val title: String,
                val price: String,
                val description: String,
                val url: String,
                val coverUrl: String)
Каждая книга имеет заголовок, цену, описание, URL для страницы с деталями на сайте и ссылку на картинку обложки.
Создаем приложение
Вы будете использовать простую архитектуру MVP в приложении. Класс отображению будет содержать всю бизнес логику, пока класс страницы работает как вью. Перед созаднием этих классов, создадим контракт между ними.
Заметка: Если вы не имеет опыта работы с MVP, то посмотрите учебное пособие Getting Started with MVP on Android.
Создадим новый Kotlin интерфейс, названный BookStoreContract (как обычно, в его собственном файле в папке src) который определяет подключение между вью и представителем. Добавим следующий код:
interface BookStoreContract {
  interface View {
    fun showBooks(books: List<Book>) // 1
    fun showLoader() // 2
    fun hideLoader() // 3
  }

  interface Presenter {
    fun attach(view: View) // 4
    fun loadBooks() // 5
  }
}
Эта вью сможет:
- Отображать список книг предоставленных её
- Показывать индикатор загрузки пока приложение получает данные от сервера
- Прятать индикатор загрузки.
Что касается от представителя, он может:
- Отображать результаты на любой вью которая предоставлена
- Начинать загрузку данных о книгах из источника данных, в этом случае, это удаленный сервер.
Выполнив это, вы теперь можете создать класс BookStorePage, и добавить в нее такой код:
class BookStorePage(private val presenter: BookStoreContract.Presenter) : BookStoreContract.View {
  override fun showBooks(books: List<Book>) {
  }
  override fun showLoader() {
  }
  override fun hideLoader() {
  }
}
Этот класс имеет конструктор с BookStoreContract.Presenter параметром. Он реализует BookStoreContract.View интерфейс с тремя необходимыми методами(пока пустыми)
Создадим BookStorePresenter класс и добавим следующий код:
// 1
class BookStorePresenter : BookStoreContract.Presenter {
  // 2
  private lateinit var view: BookStoreContract.View
  // 3
  override fun attach(view: BookStoreContract.View) {
    this.view = view
  }
  // 4
  override fun loadBooks() {
  }
}
В этом классе, вы:
- Реализовали
BookStoreContract.Presenterинтерфейс. - Добавили свойство для хранения сылки на вью.
- Реализовали метод
attach()изBookStoreContract.Presenterинтерфейса, и проинициализировать вью свойство из полученного параметра. - Реализовали
loadBooks()метод требуемыйBookStoreContract.Presenterинтерфейсом(пока пустым).
Получение данных с сервера
Вам нужен пут для получения данных с сервера. Чтоыб это сделать, добавьте следующий метод в BookStorePresenter класс.
// 1
private fun getAsync(url: String, callback: (String) -> Unit) {
  // 2
  val xmlHttp = XMLHttpRequest()
  // 3
  xmlHttp.open("GET", url)
  // 4
  xmlHttp.onload = {
    // 5
    if (xmlHttp.readyState == 4.toShort() && xmlHttp.status == 200.toShort()) {
      // 6
      callback.invoke(xmlHttp.responseText)
    }
  }
  // 7
  xmlHttp.send()
}
Нажмите option+return на Mac или Alt+Enter на PC, чтобы добавить в импорт класс XMLHttpRequest.
Пройдем по тому, что мы делаем, шаг за шагом.
Создание метода который делает сетевые запросы. Он берет URL для получения, так же как и функция со String параметром, которая передасть результат сетевого вызова.
Создаем объект XMLHttpRequest.
Указываем этот запрос посылает HTTP GET запрос на заданный URL.
Указываем callback который будет выполенен когда запрос завершится.
Проверяем если запрос имеет состояние выполнен, и если он имеет статус код 200.
Вызываем callback функцию принимаемую как параметр, и передаем её содержание сетевого ответка как строки.
Вызываем send() чтобы произвести HTTP запрост настроенный ранее.
Теперь, вы можете использовать вспомогательный метод для реализации loadBooks():
override fun loadBooks() {
  //1
  view.showLoader()
  //2
  getAsync(API_URL) { response ->
    //3
    val books = JSON.parse<Array<Book>>(response)
    //4
    view.hideLoader()
    //5
    view.showBooks(books.toList())
  }
}
В этой части кода:
- Просим вью, показать загрузочный индикатор прежде чем начать загружать данные.
Make the asynchronous request to get the books’ data.
Parse the JSON response received as an array of instances of the Book data class.
Ask the view to hide the loading indicator, since you’ve finished loading and parsing.
Ask the view to show the list of books.
You can iterate the books array and print each book.title to the console to be sure that everything works correctly. To do this, add the following lines of code after the books have been parsed:
books.forEach { book ->
  println(book.title)
}
In order to test out the presenter code, update the main() function to read:
fun main(args: Array<String>) {
  val bookStorePresenter = BookStorePresenter()
  val bookStorePage = BookStorePage(bookStorePresenter)
  bookStorePresenter.attach(bookStorePage)
  bookStorePresenter.loadBooks()
}
Here, you create a new instance of BookStorePresenter, and then an instance of BookStorePage, passing the page the presenter instance via its constructor. You then attach the page to the presenter and call loadBooks() on the presenter directly.
Build and run the project and refresh index.html. You should see a log like the following screenshot:
Books in Dev Console
When done with testing, remove the forEach loop with the print statement inside loadBooks().
Note: If you try printing the books themselves (println(book)), it’s normal to just see object Object repeated over and over in the output. This is because the JSON.parse call constructs pure JavaScript objects instead of calling the constructor of the Kotlin Book class.
This means you’ll be able to read its properties, but any methods you’d expect the class to have will be missing – including the auto-generated toString() implementation. If you need a more robust parsing solution that will do this correctly, you can take a look at the kotlinx.serialization library.
Building the UI
The index.html file contains two div tags with IDs, namely "loader" and "content". The former is a loading indicator that you can show while your app is loading data, and hide when it’s done loading. The latter one is a container that all of the book cards will be added to.
To access these DOM elements in your Kotlin code, add two new properties to the BookStorePage class as shown below.
private val loader = document.getElementById("loader") as HTMLDivElement
private val content = document.getElementById("content") as HTMLDivElement
You can always get an element in the DOM by its ID, using the document object and the getElementById() method, just like you would in JavaScript.
The getElementById() method returns a generic Element, which you can cast to the more specific element type if you need (similar to how the findViewById() method used to work on Android).
Changing the Loader Visibility
Update the showLoader() and hideLoader() methods in BookStorePage in the following way:
override fun showLoader() {
  loader.style.visibility = "visible"
}
override fun hideLoader() {
  loader.style.visibility = "hidden"
}
Again, you use the usual DOM APIs to change the visibility property of the elements to either "visible" or "hidden", as required.
The loader element is visible by default, so you should see it when you open the index.html page.
Loading
Test your code and hide the loader by adding the updating the main() function to the following:
fun main(args: Array<String>) {
  val bookStorePresenter = BookStorePresenter()
  val bookStorePage = BookStorePage(bookStorePresenter)
  bookStorePage.hideLoader()
}
You’ve updated the main function to directly call hideLoader() to hide the spinner that was visible before.
Build the project and refresh index.html in your browser. The loader should now be gone!
Building Book Elements Next, you’ll build cards for each book to display, like this one:
Book Card
Create a new class and name it CardBuilder. In this class, you’ll build an HTMLElement to present the book, bind the books’ details to it, and apply CSS. Start by updating the class to the following:
class CardBuilder {

  fun build(book: Book): HTMLElement {
    // 1
    val containerElement = document.createElement("div") as HTMLDivElement
    val imageElement = document.createElement("img") as HTMLImageElement
    val titleElement = document.createElement("div") as HTMLDivElement
    val priceElement = document.createElement("div") as HTMLDivElement
    val descriptionElement = document.createElement("div") as HTMLDivElement
    val viewDetailsButtonElement = document.createElement("button") as HTMLButtonElement

    // 2
    bind(book = book,
        imageElement = imageElement,
        titleElement = titleElement,
        priceElement = priceElement,
        descriptionElement = descriptionElement,
        viewDetailsButtonElement = viewDetailsButtonElement)

    // 3
    applyStyle(containerElement,
        imageElement = imageElement,
        titleElement = titleElement,
        priceElement = priceElement,
        descriptionElement = descriptionElement,
        viewDetailsButtonElement = viewDetailsButtonElement)

    // 4
    containerElement
        .appendChild(
            imageElement,
            titleElement,
            descriptionElement,
            priceElement,
            viewDetailsButtonElement
        )
    // 5
    return containerElement
  }

  // 6
  private fun Element.appendChild(vararg elements: Element) {
    elements.forEach {
      this.appendChild(it)
    }
  }
}
There’s a lot to do here, so let’s look at the steps one at a time:
Create new elements by using the createElement() browser API, passing in the name of the HTML tag to create. For example, use "div" to create an HTMLDivElement and "img" to create an HTMLImageElement. Bind the book data to the HTML elements you created. You will implement this bind() method soon. Apply some CSS classes to the HTML elements you created. You will also implement the applyStyle() method below. Append all of the individual HTML elements to one container. Return the container, which is the root element of the card. Write an extension function that enables you to append a variable number of children to an element, instead of having to call the regular appendChild() method many times. Binding the Data To populate the elements with data, add the following method to the CardBuilder class.
private fun bind(book: Book,
                 imageElement: HTMLImageElement,
                 titleElement: HTMLDivElement,
                 priceElement: HTMLDivElement,
                 descriptionElement: HTMLDivElement,
                 viewDetailsButtonElement: HTMLButtonElement) {

  // 1
  imageElement.src = book.coverUrl

  // 2
  titleElement.innerHTML = book.title
  priceElement.innerHTML = book.price
  descriptionElement.innerHTML = book.description
  viewDetailsButtonElement.innerHTML = "view details"

  // 3
  viewDetailsButtonElement.addEventListener("click", {
    window.open(book.url)
  })
}
In this method, you:
Set the book cover image URL as the source of the image element on the card. Set the text content for the various text elements. Add a click event listener to the button element, which will navigate to the book’s URL if the button is clicked. Applying CSS The other method still missing is applyStyle(), which you should also add to the CardBuilder class.
private fun applyStyle(containerElement: HTMLDivElement,
                       imageElement: HTMLImageElement,
                       titleElement: HTMLDivElement,
                       priceElement: HTMLDivElement,
                       descriptionElement: HTMLDivElement,
                       viewDetailsButtonElement: HTMLButtonElement) {
  containerElement.addClass("card", "card-shadow")
  imageElement.addClass("cover-image")
  titleElement.addClass("text-title", "float-left")
  descriptionElement.addClass("text-description", "float-left")
  priceElement.addClass("text-price", "float-left")
  viewDetailsButtonElement.addClass("view-details", "ripple", "float-right")
}
This method adds the proper CSS classes that you need to style the book card with a material design style. You can find these classes already set up in the styles.css file. For example, the card-shadow CSS class gives a material shadow to the card container, and the float-left CSS class aligns the element to the left.
Creating Cards Let’s go back to the BookStorePage class and start using this card creation code. First, add a property to the class, which will store an instance of CardBuilder.
private val cardBuilder = CardBuilder()
Then, go to the showBooks() method and add the following code:
books.forEach { book ->
  val card = cardBuilder.build(book)
  content.appendChild(card)
}
This code iterates through the list of books, and for each book, builds an HTML element representing it. Then, it adds the element to the content div we looked up from the DOM earlier.
Showing the Book Store Page You’re almost done now. Add the following method to the BookStorePage class:
fun show() {
  presenter.attach(this)
  presenter.loadBooks()
}
This code sets the current BookStorePage instance as the presenter’s view so that it can receive callbacks from it, and then it asks the presenter to start loading the books.
Go to the main() function and update it to call this show() method on bookStorePage. The entire main() method should now look like this:
fun main(args: Array<String>) {
  val bookStorePresenter = BookStorePresenter()
  val bookStorePage = BookStorePage(bookStorePresenter)
  bookStorePage.show()
}
Build the project and refresh index.html.
You should see the loader briefly before the app finishes loading the books. Then the book cards will appear. The cards should have a shadow when you hover over them, and the View Details button should navigate you to the appropriate page for the book.
End Product
Hooray! You have created your first web app in Kotlin :]
Happy Face
Where to Go from Here? You can download the files for the completed project (as well as the starter project) by clicking on the Download Materials button at the top or bottom of the tutorial.
We’ve covered the basics of using Kotlin.js to build web apps with Kotlin in the browser, but there’s a lot more to discover on this topic.
If you’re interested in setting up a more advanced project and development environment, you can learn about building Kotlin.js projects with Gradle, unit testing Kotlin code with JavaScript test frameworks, and even about debugging Kotlin in the browser.
Finally, you can take a look at how to call a JavaScript function from Kotlin as if it was a static method.
If you have any questions or comments, join in on the forum discussion below! We are happy to hear from you :]
Tools & Libraries Android & Kotlin Tutorials